




















Why Kids Love Making Mini Pita Pizzas
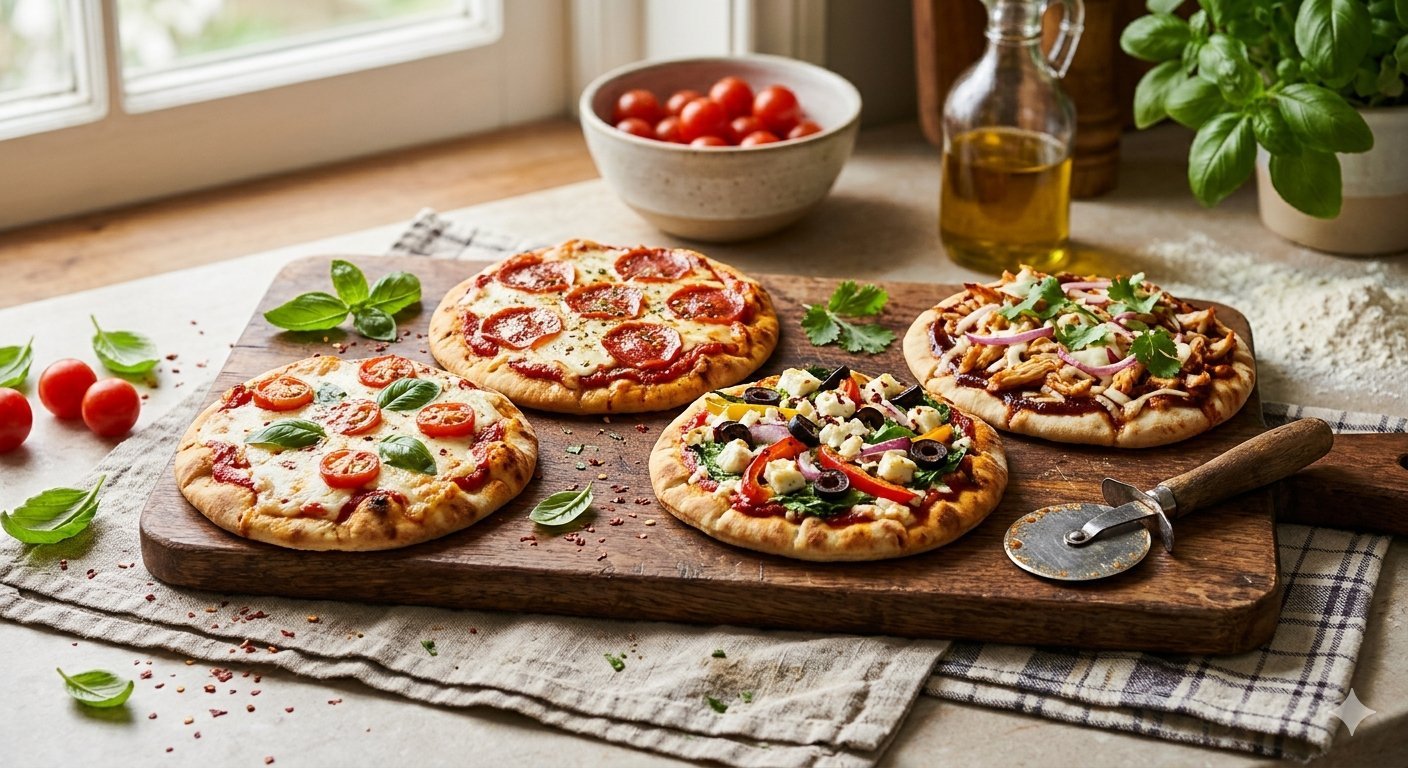
Getting kids interested in healthy food can be hard. Getting them to help cook it is often easier, and mini pita pizzas are a good place to start. The pita is ready-made, there’s no dough to knead, and every child gets to build their own pizza.
When kids pick the toppings and spread the sauce themselves, they feel proud of the result and are more willing to try new veggies. The recipe also teaches basic kitchen skills like measuring, spreading, sprinkling, and following steps in order.
The whole thing takes about 20 minutes, and the ingredients are probably already in your kitchen.
Why This Recipe Is Healthy
- Whole wheat pita adds fiber, which keeps kids full for longer.
- Tomato sauce provides lycopene and vitamin C.
- Mozzarella is a good source of calcium and protein.
- Fresh veggies add vitamins, minerals, and color without making the pizza feel like “health food.”
You control the salt, the cheese, and the toppings, which makes this much lighter than most takeaway pizza.
Ingredients (Makes 4 Mini Pizzas)
- 4 small pita breads (whole wheat if possible)
- ½ cup tomato or pizza sauce
- 1 cup shredded mozzarella
- ½ cup finely chopped veggies (bell pepper, sweet corn, spinach, mushrooms, tomato, or olives)
- A pinch of dried oregano (optional)
- 1 tsp olive oil for brushing (optional)
Equipment: baking tray, parchment paper, a spoon, and a small bowl for each topping.
Step-by-Step Instructions
Step 1: Preheat the oven. Heat the oven to 200°C (400°F) and line a baking tray with parchment paper. An adult should handle this step.
Step 2: Prepare the base. Place the pitas on the tray. Brush them lightly with olive oil for a crispier edge.
Step 3: Spread the sauce. Give each child about 2 tablespoons of sauce and let them spread it with the back of a spoon. Leave a small border around the edge so the crust stays crisp.
Step 4: Add the cheese. Sprinkle a handful of mozzarella over the sauce. Younger kids enjoy this step the most.
Step 5: Decorate with veggies. This is where the creativity happens. Kids can make smiley faces, flowers, rainbows, or just a pile of their favorite toppings.
Step 6: Bake. Bake for 8–10 minutes, until the cheese is melted and the edges are golden.
Step 7: Cool and serve. Let the pizzas rest for 2–3 minutes. The cheese stays very hot, so wait before the first bite.
Fun Topping Ideas
Set up a “pizza station” with small bowls and let kids choose:
- Classic: mozzarella, tomato slices, and a pinch of oregano
- Veggie Garden: bell peppers, sweet corn, and spinach
- Mushroom Magic: sliced mushrooms with a little garlic powder
- Paneer Tikka Style: small paneer cubes with capsicum and onion
- Sweet and Savory: pineapple pieces with corn
- Face Pizza: olive slices for eyes, a pepper strip for a smile, and a tomato nose
Tips for Picky Eaters
- Let them choose. Kids who pick their own toppings are far more likely to eat them.
- Chop very small. Tiny veggie pieces blend into the cheese, which helps with kids who dislike visible vegetables.
- Start with one new veggie. Add a familiar favorite alongside it so the pizza still feels safe.
- Make it a game. Ask for a “rainbow pizza” with at least three colors.
- Stay relaxed. If they don’t eat the veggies the first time, try again another day without pressure.
Kitchen Safety for Kids
Cooking with children is fun, but it needs a few ground rules:
- An adult should always handle the oven and the hot tray.
- Wash hands before cooking and after touching raw veggies.
- Kids should use only blunt tools. Adults should do any cutting with a knife.
- Remind children that melted cheese is hot.
Make-Ahead and Storage Tips
- Freezer option: Assemble the pizzas without baking, freeze them on a tray, then store them in a freezer bag. Bake straight from frozen for 12–14 minutes.
- Leftovers: Store baked pizzas in an airtight container in the fridge for up to 2 days. Reheat in the oven or a pan to keep the base crisp.
- Lunchbox idea: Cool the pizzas completely and pack them with a small container of dipping sauce.
More Easy, Healthy Recipes Kids Can Make
If your child enjoyed making pita pizzas, try these next:
- Banana Oat Pancakes (2 Ingredients): mash 1 ripe banana, mix in ½ cup oats, and cook on a lightly greased pan until golden.
- Fruit Yogurt Parfaits: layer yogurt, chopped fruit, and a little granola in a glass.
- Veggie Quesadillas: fill a tortilla with cheese and finely chopped veggies, then toast in a pan.
- No-Bake Oat Energy Balls: mix oats, peanut butter, and honey, then roll into balls.
Frequently Asked Questions
What age can kids start making mini pita pizzas?
Children as young as 3–4 can spread sauce and sprinkle toppings with supervision. Kids aged 8 and up can often do most of the recipe themselves, with an adult handling the oven.
Can I make these without an oven?
Yes. Cook them in a covered non-stick pan over low heat for 4–5 minutes, until the cheese melts. You can also use an air fryer at 180°C (350°F) for 4–5 minutes.
What can I use instead of pita bread?
Whole wheat tortillas, English muffins, naan, or small flatbreads all work well.
Is mozzarella the only cheese option?
No. Cheddar, a pizza cheese blend, or crumbled paneer also work. For a lighter version, use less cheese and add more veggies.
Can I make them vegan?
Yes. Use plant-based cheese or skip the cheese and add hummus or mashed avocado after baking.
Final Thoughts
Mini pita pizzas are quick, healthy, and fun for kids of all ages. They are a good first cooking project, and they turn mealtime into something kids look forward to. Give them the toppings, step back, and let them take charge of their own pizza.



[…] Mini Pita Pizzas: An Easy, Healthy Recipe Kids Can Make Themselves […]